|
Products
|
|
Tech
Services
|
|
Tech
Articles
|
|
Contact
|
|
Terms
and Conditions.
|
|
Click
Here for a Printer friendly version of this article.
|
|
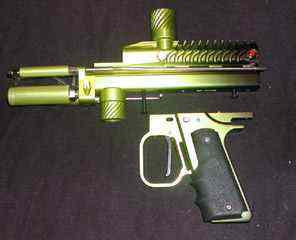
How to Install an Autococker Valve
Yet another “How to” article. This time, the valve. There are a few reasons you
may have to pull the valve out of your gun. Barrel leaks, jammed valve stems, and
upgrading are just a few.
First, the tools you will need:
Hex Wrench Set
A/C Valve Tool
Dental Pick
Wooden Pencil or small dowel
(Short list, isn’t it?)
A
note on the valve tool. Yes, you can get the valve out without one. The
catch is getting it back in. The collar on the valve tool holds the jam
nut parallel to the threads inside the body of the gun, helping to
align it with the threads. If you try to re-install the jam nut using
just a hex wrench, you can damage the threads inside the body. Not a
good thing, since, once those threads are damaged, to fix it, you have
to buy a new body. In the long run, it is cheaper to buy a $20.00 valve
tool than it is to risk destroying a cocker body.
That being said, lets get to work.
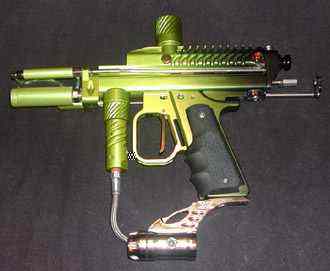
Step 1:
ALWAYS
remove the gas source for a gun before you work on it. There is no
reason to keep the tank on, and in this case, it will just make the job
more difficult, and make it dangerous to boot.
Take
the tank off, and pull the trigger a few times, just to make sure. Some
inline regs, like the stock WGP reg, can hold pressure even after the
tank has been removed.
| 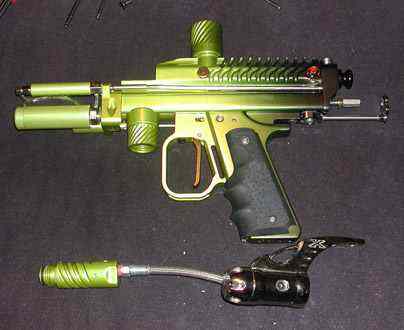
Step 2:
Out
of habit, I remove the drop forward, and inline reg first. On this Dark
Cocker, the hose between the reg and D/F is putting pressure on the
grip frame. Not a lot of pressure, but enough to make the grip frame
shift if I left them on. So, take them off. Takes two seconds, and
makes life easier.
| 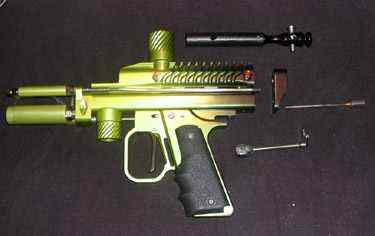
Step 3:
Now,
you have to be able to get to the jam nut and valve in the lower tube
of the body. First, remove the bolt holding the beaver tail in place.
This makes life a little easier, since it gets in the way when you are
removing the rest of the parts. Now, un-screw the cocking rod, and
remove the bolt.
After
those two are gone, there is nothing supporting the back block, so be
safe, and un-screw it from the pump arm. Extend the pump arm as far as
you can, and hold it straight while you un-screw the back block. You
don’t have to remove it, but if you don’t it gets in the way, and can
also bend the ram shaft when it flops around.
| 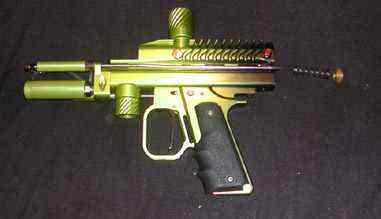
Step 4:
Un-screw the IVG from the lower tube, and remove the main spring under it.
| 
Step 5:
You
will now want to remove the grip frame. Be careful when you do this, if
you are not, then you will bend the timing rod, and that will cause
problems. Unscrew the rear bolt from the frame, and hold both the frame
and the body tightly as you un-screw the front bolt. Now, pivot the
frame a little to the right, and slide it off the timing rod. Out of
habit, I put the screws back into the body, just so they don’t get lost.
| 
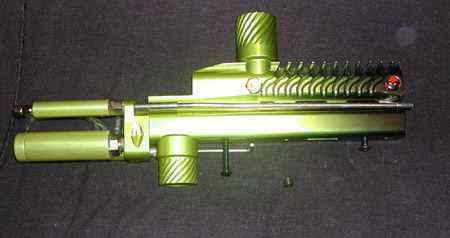
Step 6:
The only parts left in the lower tube are now the hammer, and the valve assembly.
If
you look at the slot in the bottom of the body, you will see the end of
the hammer lug. Drop a 1/8" hex wrench into the top timing hole, and
raise the lug until it is flush with the hammer. Most times, the hammer
will now drop out of the body without a problem. If it sticks, double
check the lug to make sure it isn't catching the body, then take the
cocking rod, thread it into the hammer, and use it to pull the hammer
out.
| 
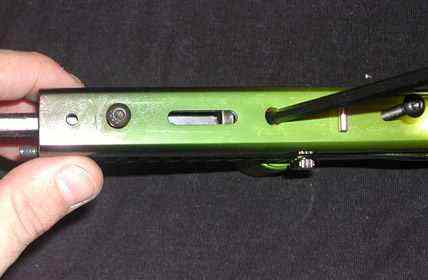
Step 7:
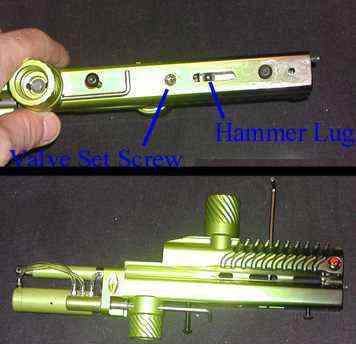
There
are two things holding the valve in a cocker. The jam nut inside the
lower tube, and a vertical set screw in the bottom of the body. Unscrew
the vertical set screw, and you will be able to see the bottom of the
valve.
| 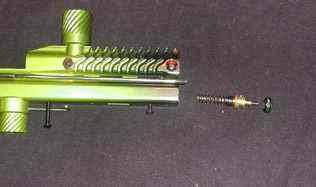
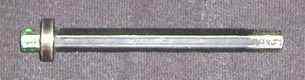
Step 8:
Take
your valve tool (shown below), and slide it into the lower tube, and
gently push while you turn it. You may feel a little resistance from
the valve spring, but that’s normal. Once you feel the tool slide into
the jam nut, simple un-screw it.
| 
Step 9:
If
you are lucky, your valve will slide right out of the body with a light
tap on the body. Most times, you won’t be lucky. Take a pick, or other
small tool, and push on the valve through the set screw hole. You will
want to be VERY gentle, as you don’t want to damage the threads for the
set screw.
If the valve is REALLY stuck, you can remove the front
block banjo bolt, and push the valve out from the other side. Depending
on your three way, you may just be able to slide the front block off,
leaving the timing rod, and three way shaft in place. Just don’t bend
anything if you have to go this route.
|
OK,
now everything is out of the lower tube of the gun. Do what ever you
wanted to do that go you started on this project in the first place.
Putting it all back together is just reversing the steps, but a few notes on getting the valve back in.
First,
check the valve body o-ring for chips or breaks. Nothing is worse than
going through all the steps of getting it back in the gun, and lined
up, just to find a barrel leak, and have to pull it out all over again.
When
you re-install the valve, make sure the valve spring stays where it is
supposed to be, on the end of the cup seal. I assemble the valve body,
cup seal, jam nut, and spring, and balance it all on the end of the
valve tool. Then slide the assembly into the body while holding it
vertical. You can keep an eye on your progress through the lug slot in
the body, so it’s not that hard to do. Once you feel the jam nut hit
the threads, turn it COUNTER-CLOCKWISE until you feel a slight click.
That click is the first thread of the jam nut mating with the first
thread in the body. GENTLY screw the jam nut back into the body about
1/2 turn.
Don’t forget, if it came out easy, it will go in easy. You
do not what to cross thread the jam nut, because you will be buying a
new body if you do.

You
have to line up the port in the valve and the port body to get the air
to travel to the bolt. Once the jam nut is keeping everything in place,
take the pencil (yes, I know, I used a hex wrench in the pictures. I
was running out of time, and could’t find a pencil. The draw back of
using a hex wrench is that you can damage the threads for the set screw
if you are not careful.), and use it to line up the ports in the valve.
With a stock valve, you should be able to see all the way into the
upper tube.
Now,
with the pencil holding the valve in place, gently tighten the jam nut
until it’s snug. Pull out the pencil, and install the valve set screw
in it’s place, again, just until it’s snug.
Tighten
the jam nut all the way down, as tight as you can get it. I use a
wrench or vice grips on the valve tool, but you don’t want to use too
much force. Just get it very tight, not “Oh my god, did they use an air
hammer putting this thing in” tight. Once the jam nut is tight, remove
the set screw, double check the alignment of the valve in the body, and
re-install the set screw if it’s lined up correctly. If it’s not lined
up, remove the jam nut, and try again.
Once the valve is back in, simply put the other parts back on, and re-time the hammer lug setting.
©2002 |