|
Products
|
|
Tech
Services
|
|
Tech
Articles
|
|
Contact
|
|
Terms
and Conditions.
|
|
Click
Here for a Printer friendly version of this article.
|
|
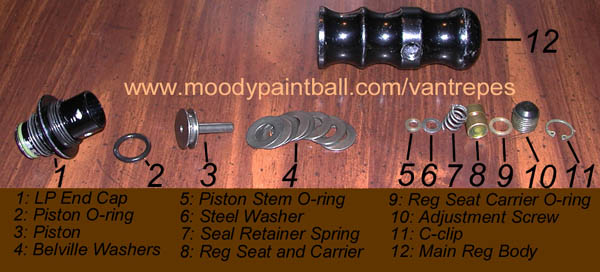
How to rebuild an WGP In-line Regulator
All
of the WGP inline regulators with an external adjustment are built the
same. The bodies were changed, but the guts were not.
Because of that, this article cover the Karnivore, Black Magic,
and Ergo reulators. The first step in rebuilding the reg is getting it apart. To do this you will need:
C-clip Pliers, or a strong pick
1/4” hex wrench
Tooth Pick (trust me, you will want one, just get it and keep reading)
Strap Wench
Bench Vice
Some sort of padding for the vice. A towel will work, but a mouse pad is better.
Here is a picture of the internals of the Ergo Reg
Step One: Remove all gas fittings from the reg.
You
will need to put a good deal of force on the body of the reg to get it
apart. You don't want that force to end up pushing on the side of the
fittings and snapping one of them off.
Step Two: Removing the LP End cap:
Put
the body of the reg in the vice, using the padding to keep the finish
from being damaged. Take the strap wrench, and get a good hold on the
threads at the top of the reg. DO NOT USE VICE GRIPS!!! If you damage
the threads at the top of the reg, not only will it not seal properly,
but it may never thread back into the ASA of the gun.
If
you don't have a strap wrench, and don't want to buy one, then you can
do it a different way. This runs a risk of damaging the top threads,
but it beats using Vice Grips on it. Put your padding around the top
threads of the reg, and carefully lock them into the vice. Then grab
the body of the reg, and un-screw it.
Step Three: Remove the Piston, and Belville washers.
Once
you have the end cap off, look inside the body of the reg. You will see
the top of the piston. Gently tap the reg on a table to get them out.
If they won't come out, then put a piece of tape over the end of the
reg, and you can get it out later.
When the piston comes out, there
are 7 or 8 Belville washers under it. These create some of the force
that controls the pressure setting of the reg. DO NOT LOOSE ANY OF
THEM!!! In older styles, there are seven washers, in newer ones, there
are eight. Put them to the side in a safe place.
Step Four: Remove the C-clip and adjustment nut.
Use
a pair the c-clip pliers to remove the C-clip (or a strong pick if you
don't have the pliers). If you go the pick route, be careful, you will
need a good amount of force to get it 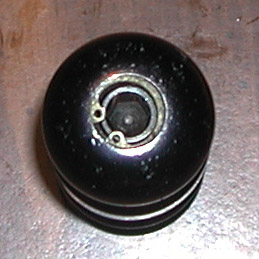 out, and once it's out, it may go flying. out, and once it's out, it may go flying.
Now
that the C-clip is out, un-screw the adjuster nut all the way. Under
it, you will see the reg seat. Tap the reg on the table, and the reg
seat and seal retainer spring will drop right out. There is also a
small washer that was held in place by the spring. Most times this
sticks to the o-ring, and won't fall out, but keep an eye out for it.
Take
the toothpick (see, I told you, you need a toothpick) and wiggle the
washer until it falls out. Using a toothpick ensures that the o-ring
directly under the washer doesn't get damaged.
Step Five: Alternate way of getting the piston out.
If
the piston did not come out when you tapped in on the table in Step
Three, now is the time to get it out. If it did come out, then skip to
Step Six.
Remove the tape, and grab that toothpick again. Look into
the bottom of the reg. Inside the o-ring in the bottom is a small metal
tube. That is the bottom of the piston. Gently push it up and out the
top of the reg body. Don't use anything metal, or sharp, as that could
damage the bottom of the piston tube. The bottom of the piston is what
seal against the reg seat, so any damage here, and it can cause the reg
to creep up from the set pressure.
When you push the piston out,
there are seven or eight (depending on how old the reg is) Belville
washers under it. DO NOT LOOSES THESE!!! Put them in a safe place, and
move to Step Six.
Step Six: Removing the piston stem o-ring.
There
is a trick to getting this on out. Take that trusty toothpick, and push
the o-ring out from the TOP of the reg. It may take a few tries, but
keep at it, you will get it.
So, now the reg is completely
apart. Wipe down all the parts with a clean, dry cloth, and set them
aside. You will want to make sure the body of the reg is nice and clean
also, so clean that while you are at it. One place you will want to
make sure is spotless is the recess for the piston stem o-ring. It's
pointless to go through all this work, just to put the new seals into a
dirty main body.
Now that everything is clean, start
inspecting the seals. If you had a leak coming out of the small hole in
the body, replace the piston o-ring, and the piston stem o-ring. If the
reg's output pressure was creeping up, replace the reg seat, and
closely inspect the end of the piston's tube. Any nicks or a rough
surface can cause the reg to creep up.
Now we have to put this pile of parts back together. Mostly you will do it in reverse order, but here are a few tricks.
Step One: Prepare the parts
I
use Dow 33 on the regs when I rebuild them. Good for the seals, doesn't
gum up, and stays where it is supposed to. You will want a light coat
on the piston o-ring, the piston stem, the reg seat carrier o-ring, and
also a very light coat on each of the Belville washers. The coat on the
washers is more to protect them from rust then to actually lube them,
so make sure you cover the whole washer with a LIGHT coat.
Step Two: Installing the piston stem o-ring.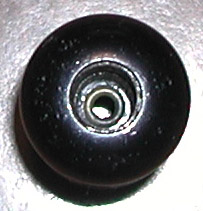
This
is the hardest part of the whole job. If this o-ring isn’t where it’s
supposed to be, and in there perfectly, the reg will leak. Take the
piston, and insert it into the top of the reg body. Flip the reg over
(keep a finger over the top, just to make sure the piston doesn’t fall
out) and look into the bottom. The piston stem should be sticking much
farther out the bottom of the reg than before. Take the piston o-ring,
and the washer, and slide them over the piston. Put the seal retainer
spring in, and let it all slide into the body of the reg.
This
picture shows the piston stem o-ring inside the body. Be careful when
you remove or install it, as any damage to the o-ring will make the reg
leak out of the bleed hole in the body.
Step Three: Installing the reg seat, adjuster and c-clip
Now
that the stem o-ring and washer are held in place by the piston stem,
carefully slide the reg seat in on top of them. You don’t want to push
too far, or you can push the piston o-ring off the stem. Just slide the
reg seat in until you can feel the spring start to compress. Now, screw
the adjuster in just far enough to clear the groove for the C-clip.
Drop the c-clip back in, and we are done with the bottom half of the
reg.
Step Three: Piston and Belville washers.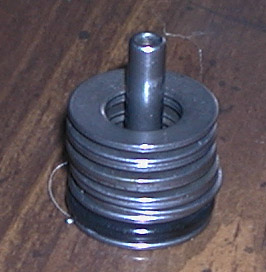
Now
that the stem o-ring is held in place by the washer and spring, tap the
reg on the table to get the piston to drop out of the body. If you
lubed the piston o-ring, and the stem, it should drop out after a tap
or two. Once it’s out, we need to install the Belville washers.
This is VERY important, the washers must be installed in this pattern: ( )( )( )( ).
If they are not, then they will not provide enough spring pressure for the reg to work properly.
If your reg has seven washers, it doesn’t matter how the pattern starts, just as long as they are in the correct pattern.
Step Four: Install the LP End cap
Go
back to the vice use the same technique to re-install the end cap. You
will want the end cap nice and tight, or it will un-screw from the body
when you try to remove the reg from the gun. That leaves the end cap in
the ASA, with no good way to remove it.
Step Five: Ball Park the reg's output
Once
everything is installed, the reg’s output will be extremely high. You
will want to turn the adjuster in as far as it will go with ease before
you put it back on the gun. Putting 800psi into the gun won’t hurt it,
but it’s better to start low, and work your way up.
Now you will have to re-set the reg. If you have never done it before, read my article on Sweet Spotting a Reg,
and follow the directions in it. Keep in mind, the Ergo adjusts
backwards from most regs. So turning the adjuster counter-clockwise
increases the out-put of the reg.
Now, enough work at the bench, go play!
©2002
|